Rofi is a window switcher and application launcher you can install on your Linux desktop to improve your workflow. Most of the time I use it to either launch an application or to search the web. Rather than having different shortcuts for these two purposes I use one script to handle both situations. Here’s how you can do the same.
Prerequisites #
There are a few things you will need to get this working:
- Rofi
or rofi-wayland
- if you are using a Wayland based desktop environment or window manager then you should use rofi-wayland, if you do not know which you are using, open a terminal and run the following command:
echo $XDG_SESSION_TYPEand it will return “wayland” or “x11”. - Some familiarity with terminal - how to run commands, execute scripts, that sort of thing.
- A way to add shortcuts to your setup - this could be by editing a file in a minimalist window manager or by an application within your desktop environment, it will be slightly different on each Linux distro.
I will start by outlining how to run a script with a shortcut, then I will show you how to add a script to PATH, and then make that script fit our needs with rofi.
Running a Script with a Shortcut #
I am using Hyprland
as my window manager (a window manager is just a minimal desktop environment), to run a script with a keyboard shortcut, I need to add that shortcut to my Hyprland configuration file, that file lives at ~/.config/hypr/hyprland.conf. To add a shortcut, I can do this:
$mainMod = SUPER
bind = $mainMod, r, exec, rofi -show drunThe above settings makes the “windows key” on my computer (also known as the SUPER key) into a special mod key that I then use before other keys for running scripts, launching applications and so on. In this example, I would press Super+r to run rofi in drun mode. To see the other available modes, type rofi in your terminal, you will see modes like rofi -show window which allows you to use rofi as a window switcher, along with others.
In Hyprland, setting up keyboard shortcuts like this is referred to as setting keyboard bindings, you can read more about them here (other window managers and desktop environments have similar conventions, this is the syntax for i3 - another window manager - as an example).
To run a custom script, we just need to change the binding a little:
$mainMod = SUPER
$menuWebSearch = rofi-web-search.sh
bind = $mainMod, SPACE, exec, $menuWebSearchThis time I am using Super+space to run $menuWebSearch, which is a variable equal to a script. Until you have the script set up and added to PATH, this will not do anything, so that is what we will do next.
Tip You only need to set the
$mainModvariable once, usually at the start of the config file. You can see my entire hyprland config on my GitHub.
Adding a Script to PATH #
If you open a terminal and execute echo $PATH you will see a list of directories that are in your user’s PATH - it will likely include directories like /usr/local/bin and other directories that end in bin (which is just a shorter name for “binary”). All it shows is places where you can put binaries and scripts that you will be able to run from anywhere on your computer. You could add your script to one of the directories listed here, or you can add your own personal directory to PATH instead. I prefer to add my own directory as it keeps my personal scripts separate from ones created by applications and programs that I have installed. It is also easier to keep track of your own scripts this way, especially if you end up making a lot of them.
To copy my set up, you will need to make a scripts/ directory inside your .local/ directory and put the script named rofi-web-search.sh inside this new directory. To do that, follow these steps:
- Go to your home directory by executing
cd ~in your terminal. - Go to your local directory with
cd .local- if you do not have a local directory, make one withmkdir .local && cd .local - Make the scripts directory and move into it with
mkdir scripts && cd scripts - Make the script file with
touch rofi-web-search.sh - Open that file with a text editor, you can use whichever you have installed:
- VS Code:
code rofi-web-search.sh - Nano:
nano rofi-web-search.sh - Vim:
vim rofi-web-search.sh
- VS Code:
- Once you have opened the file, paste the following code into the file:
#!/usr/bin/env bash

echo helloThis is just some simple code to test if we have added our script to PATH properly. To finish, there’s just a few more steps:
- Save the file and return to your terminal, execute the following command whilst still inside the
~/.local/scripts/directory:chmod +x rofi-web-search.sh. This makes the file executable by adding the executable permissions to the file. - Go to your home directory once more with
cd ~ - Use
vim .profile(or your preferred text editor) to open the profile file - this file is used by bash and zsh to read environment variables (if you do not have a profile file, you can make one withtouch .profile && nano .profile). In other words, it’s a place to declare variables that your terminal/shell will read to get information about your set up. - Paste the following code into this file: `PATH="$HOME/.local/scripts:$PATH"
- Save the file and source it with
source .profile
Now when you run echo $PATH you should see the .local/scripts/ directory listed as one of the directories your terminal looks inside for executable files. You should also be able to type rofi-web-search.sh from any directory in your terminal and see hello printed into the terminal. Try it by changing your current directory to your downloads directory or your .config/ directory and then executing rofi-web-search.sh.
Tip Using
.shat the end of a file name is not necessary on Linux, you could just name the filerofi-web-search- however it can be useful to use file extensions so as the user you can glance at the file name and get an idea of what the file will do.
The Rofi Script #
It’s not very useful for the script to just print “hello” to the terminal, so edit the file again with code ~/.local/scripts/rofi-web-search.sh and remove the contents, replacing it with the following code:
 1#!/usr/bin/env bash
 2
 3DESKTOP_DIRS=(
 4    "$HOME/.local/share/applications"
 5    "/usr/share/applications"
 6    "/usr/local/share/applications"
 7)
 8
 9entries=()
10declare -A desktop_map
11
12for dir in "${DESKTOP_DIRS[@]}"; do
13    if [[ -d "$dir" ]]; then
14        while IFS= read -r -d '' file; do
15            name=$(grep -m1 -i "^Name=" "$file" | cut -d= -f2)
16            exec_line=$(grep -m1 -i "^Exec=" "$file" | cut -d= -f2 | cut -d' ' -f1)
17            [ -n "$name" ] && entries+=("$name") && desktop_map["$name"]="$exec_line"
18        done < <(find "$dir" -name "*.desktop" -print0)
19    fi
20done
21
22choice=$(printf "%s\n" "${entries[@]}" | rofi -dmenu -i -p "Launch/Search:")
23
24if [[ -n "$choice" && -n "${desktop_map[$choice]}" ]]; then
25    nohup ${desktop_map[$choice]} > /dev/null 2>&1 &
26else
27    if [[ -n "$choice" ]]; then
28        query=$(echo "$choice" | sed 's/ /+/g')
29        if [[ "$choice" =~ ^http.* ]]; then
30            xdg-open "${query}"
31        elif [[ "$choice" =~ ^www\.* ]] then
32            xdg-open "https://${query}"
33        else
34            xdg-open "https://search.brave.com/search?q=${query}"
35        fi
36    fi
37fiWhat the Script does #
This script itself does a few things. It firstly searches the directories where the desktop application files are listed. These are just files that list information about the programs on your computer, for example, this is the entry for kitty, the terminal I am using:
[Desktop Entry]
Version=1.0
Type=Application
Name=kitty
GenericName=Terminal emulator
Comment=Fast, feature-rich, GPU based terminal
TryExec=kitty
StartupNotify=true
Exec=kitty
Icon=kitty
Categories=System;TerminalEmulator;
X-TerminalArgExec=--
X-TerminalArgTitle=--title
X-TerminalArgAppId=--class
X-TerminalArgDir=--working-directory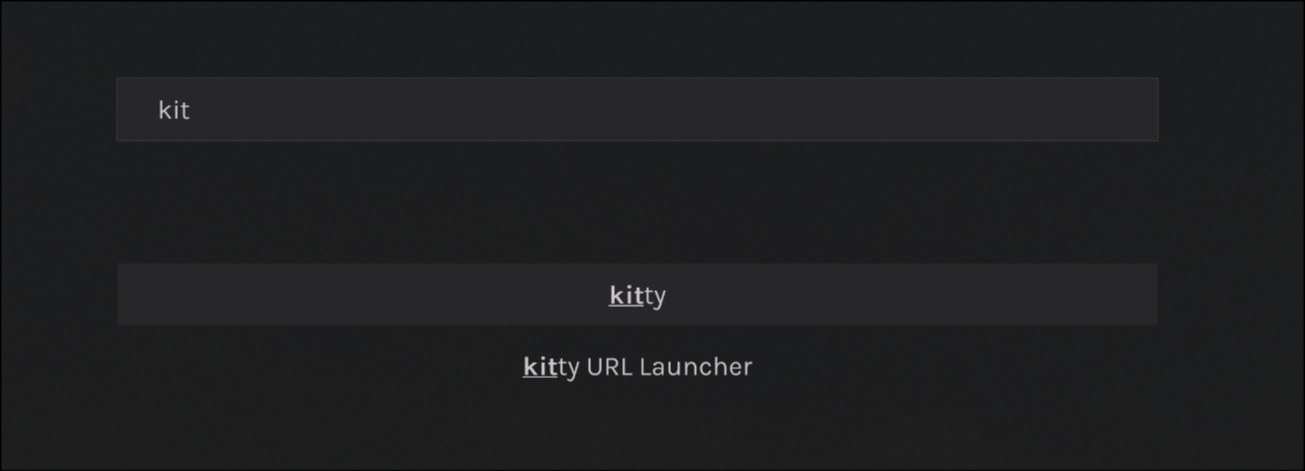
X-TerminalArgHold=--holdThe script then looks within those files to see what value is listed as the executable, so in the kitty desktop file, it looks at Exec=kitty. All of these values are stored in the entries variable. These entries are printed to the screen within rofi when you first launch the script. Then when the user types in what they are searching for, the script can do a few things:
- If the user types in “kitty”, this will match the “kitty” application (as long as you have it installed), the user will press enter and this application will launch.
- If the user types “kitty configuration options”, this will not match an application, so a browser will be launched and Brave (the search engine used in this script) will be filled with the search query.
- Finally, if the search starts with http(s)" or “www”, then the script opens the browser and follows the URL rather than using the search engine.
- If the user ends the script with the escape key, the operations are all cancelled.
Customising the Script #
You can change the script in a few ways to suit your needs. For example, if you want to use a different search engine you can change that query string to be of your preferred search engine, DuckDuckGo for example: xdg-open "https://duckduckgo.com/?q=${query}". This line opens your browser, I have my default browser set to Firefox, you can set your browser variable in the .profile file by adding this line: export BROWSER="firefox".
Rofi itself can be themed, there are a few default themes to choose from, if you open a terminal and execute rofi-theme-selector you will see the themes you current have installed. You can install custom themes and put them inside the .local/share/rofi/themes directory. This GitHub repo
has some nice themes you can try out.
Thank you for reading!
If you enjoyed this article, you can get updates from my RSS Feed to make sure you don't miss out any new posts.
If you have any questions, feel free to contact me.